
From custom crafts and industrial components to signage and interior design, acrylic has become a go-to material for many industries. Tool selection is just as important for creativity and precision working with acrylic. CNC machines have revolutionized acrylic work due to their unparalleled speed, versatility, and accuracy. Knowing the right machine to select and how to optimally use it can enhance the work of a small business owner, artist, or DIY fanatic. This guide will cover all the information needed, from the best equipment to mastering engraving techniques, to achieve impeccable results.
What is a Laser Cutter and How Does It Work?
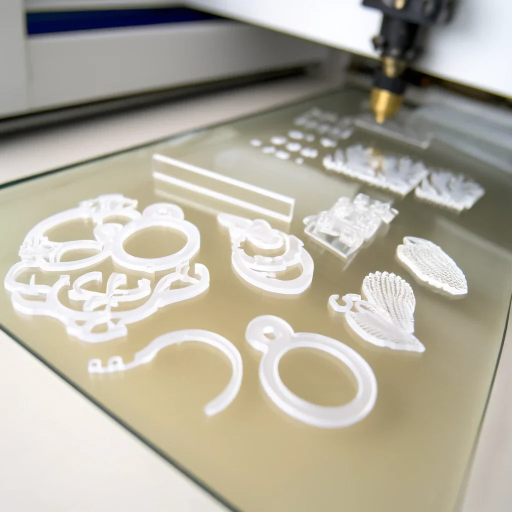
As the name suggests, a laser cutter uses a laser beam to cut materials, engrave, or etch them with a great deal of precision. The way it operates is through directing a laser to heat a specific material. While the laser is focused on the material, either vaporization or melting occurs based on the amount of heat applied. Because of this, there will be smooth and accurate cuts or designs made. A common example of a material that laser cutters use is acrylic because they can get smooth edges and complex details without extra work.
Understanding the Components of a Laser Cutting Machine
Every laser cutting machine comprises various parts which function simultaneously to attain accurate cutting and engraving results. A cutting machine consists of a multitude of parts, the most vital being the high-powered laser source precisely designed to generate laser beams. Subsequently, the beam is funneled through modules called mirrors or fiber optics to be focused on the material to be cut. As the laser moves, it cuts through and engraves the material with extreme accuracy. Moreover, the movement of the laser is supervised by software housed in a computer that traces design files and implements intricate patterns or shapes. Many sophisticated laser cutting machines have additional features such as a cooling system to prevent overheating, exhaust systems for fume removal, and adjustable settings for thickness and material type. With all technology working together, consistent precision performance is guaranteed against multiple sophisticated applications.
Understanding Acrylic Laser Engraving
The process of acrylic laser engraving entails a meticulous method of marking or designing on the surface of acrylic by removing portions of materials using a focused laser beam. Equipment that employs laser engraving techniques possesses CO2 lasers that are ideal for acrylics as they produce refined cuts and edges because of their accuracy.
Custom designs can also be made quickly because of the speed at which laser engravers operate which is 20 to 120 inches per second. Because acrylic has a high absorption rate of CO2 lasers, around 10.6 microns, the material absorption rate also becomes important. With modern technology, advanced systems are capable of achieving 1200 DPI (dots per inch) which ensures that even the tiniest details are engraved with perfect precision.
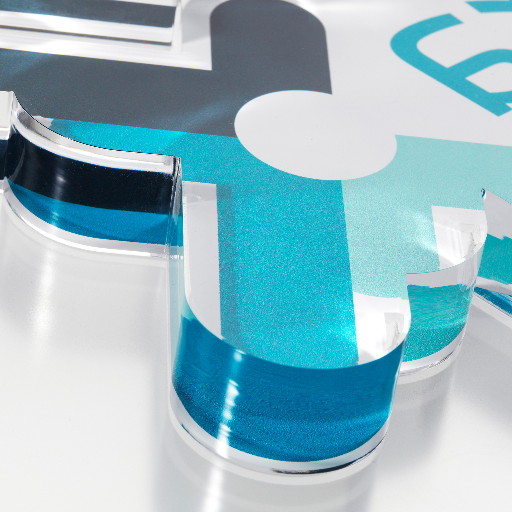
In order to accomplish work with increased efficiency, modern machines are integrated with specialized software for controlling power output and vector engraving. For example, engraving cast acrylics typically results in a frosted look whereas extruded acrylics maintain a more clear appearance. These differences make cast acrylic decorative while extruded acrylic is useful where clarity and functionality are required.
Acrylics that have undergone laser engraving for industrial purposes include signboards, awards, decorative panels and custom made marketing materials. This process is both cost effective and eco-friendly, maximizing resource efficiency and often eliminating the need for additional finishing processes.
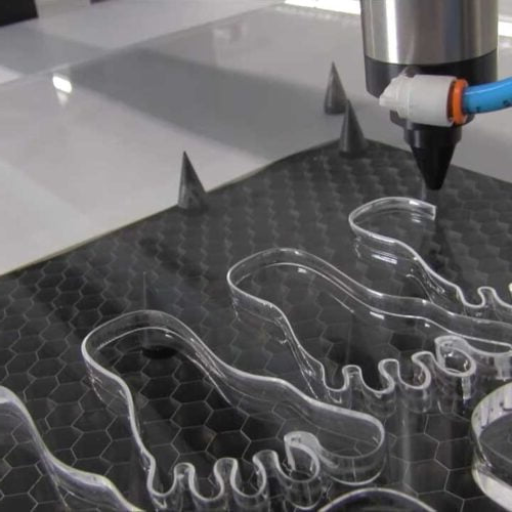
The Function of Lasers and CO2 Lasers in Cutting Acrylics
The cutting of acrylics with laser technology benefits profoundly from CO2 lasers. Their operational wavelength, usually at 10.6 micrometers, is ideal for acrylic, its high absorption guarantees effective energy use. The modern CO2 laser systems have new technological controls that guarantee constant output. This leads to edges that are smoother and less material being changed.
The battle-tested principles of maximizing efficiency during acrylic cutting rest upon the balance between cutting speed and laser power. For instance, a standard practice for cutting cast acrylic 3mm thick would be using a 40W CO2 laser and 20mm/s cutting speed. Relative to the thickness of the material, these parameters can be finely tuned for optimal accuracy. In addition, modern industrial grade CO2 lasers are usually equipped with some degree of automation which improves workflow processes through error reduction.
Recent studies emphasize the growing adoption of CO2 lasers across highly demanding precision industries such as sign making and prototyping. Furthermore, these lasers also have green advantages because they generate little waste and consume a meaningful amount of power. This makes them appealing for both small businesses and large scale manufacturing operations.
How to Laser Cut Acrylic?

- Upload or Create Your Design: Using vector cutting software such as Adobe Illustrator or CorelDRAW, create your cutting design or upload an existing one. Make sure it is optimized for cutting; this often means using the appropriate symbols to show cuts.
- Selection of Acrylic: Select the appropriate type and thickness of acrylic for your project. Typically, cast acrylic is better for laser cutting; extruded acrylic is not as good because it tends to give rough cuts.
- Laser Cutter Preparation: The acrylic sheet needs to be positioned on the machine’s cutting bed. Set the parameters appropriate for the dimensions of the acrylic, such as the power and speed of the laser. Most machines come with a recommendation for the type of material to be used.
- Settings Check: Set a test piece of acrylic to be cut, and execute a test cut for the final adjustment, ensuring cleanup.
- Execute Cut: Run the job but with the vents on to avoid smoke build up. The process must be observed to ensure it is accurate and safely done.
Choosing the Right Acrylic Sheets
A lot goes into selecting acrylic sheets, including thickness, intended purpose, and type – all pertinent when choosing for laser cutting purposes. Acrylic’s two main types include: cast and extruded. Cast acrylic is preferable to extruded, as the ease of laser cutting is more prominent with it and the edges do not deviate, yielding exceptional quality at every turn. Extruded acrylic, on the other hand, tends to melt as it is cut which causes more jagged edges to be formed.
The common standard thicknesses used for acrylic sheets include: over 1 inch (25 mm) and 1/16 inch (1.5 mm). The 1/8 inch (3 mm) and 1/4 inch (6 mm) variants are favored. Research has shown that the best range for the complexities of laser cutting acrylic projects lies between 2mm and 6mm. The structural stability is maintained while allowing flexibility in controlling the material.
Remember to check for the required color and finish of the acrylic. The need for transparent, opaque or translucent arms with matte or gloss finishes provides versatility to meet the preferred aesthetics of the project. Most suppliers will stock laser-compatible acrylic sheets and will advertise them as such, meaning they have undergone testing to ensure they are compatible with laser systems.
Arrange the Laser Cutting and Engraving Machine
In setting up your machine, a very important consideration is the laser power and speed settings. Both need to be set for certain cut depth, engraving depth, and finish. For example, detailed engravings where precision counting is more thoroughly involved would need power set lower and speed set as slow as feasible. On the other hand, quick cutting through thick materials would need high power and fast speed.
Like modern devices, modern lasers have more sophisticated options such as autofocus sensors that dynamically change the position of the laser head to the surface of the material below it. These systems guarantee constant laser results on uneven or jagged surfaces. Moreover, cutting quality is aided due to air assist systems: they blow cutting debris and cool the materiel to prevent harmful burns and discoloration.
To get the most optimal results, use test patterns on scrap material to calibrate your equipment. For example, the settings for engraving acrylic can start with power at 50-70% and spindle speed at 20-30 mm/s, but these values ought to be modified depending on the thickness and type of material you use. Most laser manufacturers offer free downloadable libraries with setting suggestions, which serve as an effortless starting point for materials such as wood, acrylic, and metal.
Do not forget the important maintenance tasks like cleaning the machine’s lenses and mirrors regularly to avoid optical problems and ensure reliable performance. Provided there are no unexpected software hitches, the laser cutting and engraving machine should be able to give off professional quality results with meticulous handling and thorough preparation.
Clear Acrylic Cutting Tips
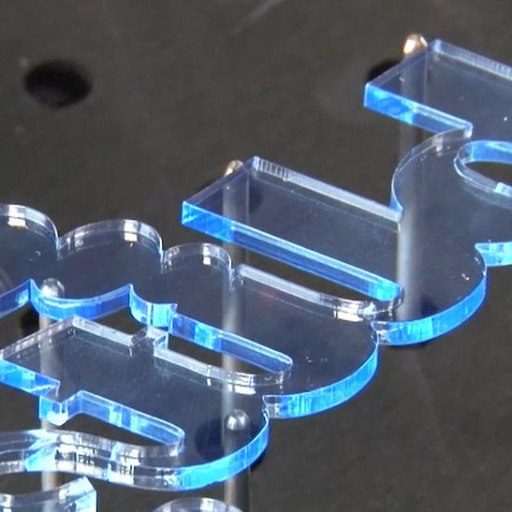
Achieving polished and clean edges in clear acrylic can be quite tricky. However, it can be done through several steps. Primarily, a CO2 laser cutter which has a wavelength fitting for acrylics, 10.6 microns, is a must. Adjusting the parameters of power and speed will move you one step closer to your goal. Moreover, when planning on cutting an acrylic sheet of 1/4 inch (6 mm) thick, a power setting of 60-80% paired with a speed of 0.5-1 inch per second is generally preferred. However, others may have to tweak it based on the specifics of their machine.
Air assistance is another important feature that minimizes flare and edge burning on the acrylic edges by applying a blast of air during the cutting. Optimize the focus of the beam if it needs to be altered to further enhance the balance on the lessen the possibility of surface flaws. It’s also important to mention that cast acrylic, unlike extruded, gives a more refined edge because extruded acrylic has a lower melting point and is more susceptible to melting.
Ultimately, remember to always complete ergonomic testing on a spare piece of acrylic first so that you can adjust these settings to work best. Integrating these methods along with routine machine upkeep makes it easy to obtain crisp cuts and excellent finishes from clear acrylic.
What Are the Different Types of Acrylic for Laser Cutting?
- Cast Acrylic: The process of pouring acrylic into molds is referred to as “casting” and as its name implies Cast acrylic is produced using this method. It can be used for engraving accurately because it provides a frosted finish. Clean edges during cutting and higher heat resistance are other advantages of cast acrylic.
- Extruded Acrylic: For more economical single-side reflective sheets, cast acrylic is less costly than extruded acrylic. While extruded acrylic has nominally consistent thickness, it is lower in heat resistance and more susceptible to melting. Extrusion creates form, and pushing acrylic material through said form is how Extruded acrylic is defined. Moreover, cutting extruded acrylic leaves it with slightly rougher edges than cast acrylic.
Comparing Cast and Extruded Acrylic
| Property | Cast Acrylic | Extruded Acrylic |
|---|---|---|
| Manufacturing Process | Poured into molds, resulting in varied thickness | Continuously pushed through a form, ensuring consistent thickness |
| Cost | Higher cost due to complex manufacturing process | More affordable due to streamlined production |
| Heat Resistance | Higher, making it less prone to warping or deforming under heat | Lower, making it prone to melting during cutting |
| Optical Clarity | Superior clarity with fewer impurities | Good clarity but may contain slight distortions or impurities |
| Cutting Performance | Produces clean edges and frosted finish when engraved | May result in rougher edges and lacks a frosted effect |
| Density | Heavier and sturdier | Lighter with slightly less durability |
| Applications | Ideal for high-quality displays, signage, and art installations | Best for cost-effective projects or large-scale applications |
Benefits of Using Cast Acrylic
The use of cast acrylic is very popular in many different fields because of the benefits it provides. One benefit of cast acrylic is that it is much clearer than extruded acrylic. Also, it exceeds glass in terms of up to 92% light transmission like glass, making it a perfect material for aquariums, display cases, and signs. Cast acrylic’s weathering and UV resistance means it can stand the test of time without losing its structural strength and transparency even under the sun.
Another important benefit of cast acrylic is that its strength and impact resistance is exceptional . It is 17 times stronger than glass, while still being significantly lighter than it; thus, making it easier to transport and install. Cast acrylic is also very versatile when it comes to machining and shaping. It can be bent, carved, or molded and worked on because it is custom-tailored to complex design projects. Recent developments in production technology ensure that cast acrylic stays eco-friendly, with many manufacturers now using low-emission and recyclable material. Because of these qualities, cast acrylic has higher value in architectural, automotive, and artistic work.
When to Use Extruded Acrylic
Applications where cost effectiveness and consistency are valued the most tend to favor extruded acrylic. Unlike cast acrylic, the extrusion process offers uniform thickness across sheets. There is no significant variation for projects needing precise dimensions, which adds to the efficiency of extruded acrylic. It is also easier to cut, bend shape into numerous forms, which is useful for high volume applications such as signage, displays and protective barriers.
Recent insights from the industry state that extruded acrylic is relatively cheaper to produce than cast acrylic, making it a cost efficient option for large scale projects. The material is also known for its durability due to the optical clarity and UV light resistance it possesses. Overtime, the material retains its polished surface and with advances in manufacturing, extruded acrylic is available in many colors and with various surface finishes for creative and commercial uses. Market data shows that extruded acrylic is often used for indoor installations or regions with moderate temperature fluctuations where reliable performance is required.
What Features to Look for in an Acrylic Laser Cutter?
- Power Output: Choose a laser cutter that has enough power, ideally between 40W and 100W, to cut or engrave acrylic with precision. Lower power outputs will work, but 40W is much slower in engraving, compromising the level of precision achievable.
- Bed Size: Choose a laser cutter that has a cutting area big enough to accommodate the sizes of sheets of acrylic you intend to work on.
- Precision and Speed: Choose a laser cutter that has high precision facuting spokes for intricate designs to ensure high quality at various operating speeds.
- Software Compatibility: Purchase a laser cutter that uses software which allows for easy interaction to facilitate the input and operation of designs.
- Cooling System: Adequate cooling is required to maintain consistent performance of the laser cutter and to avoid overheating after prolonged use, making a reliable cooling system an essential feature.
Wattage and Power Levels
Each laser cutter has a specific wattage and power level. The maximum power is determined by not just the design, but also the material you are using. Power level is a feature that has to do with adjusting the intensity of a laser cutter, and its intricacies can be controlled precisely. Higher power settings drastically improve cutting for wood, acrylic, or metal as they are denser. On the other hand, softer materials like fabric or paper require much more delicate handling and detailed engraving techniques.
Areas of Expansion or Cutting
The regions to be utilized for laser engraving and cutting is an important specification, not just in terms of work accuracy but also precision and skill-based requirements. The space available for work with laser machines is multi-functional and allows more intricate designs to be completed in one go. For instance, industrial laser cutters tend to be larger than 48 x 96 inches and can serve multifunctional purposes ranging from signage to architectural model creation.
In contrast, smaller work areas, generally not exceeding 12 x 16 inches, are perfect for a hobbyist or a business that specializes in miniature, detailed pieces like jewelry, custom keychains, or personalized gifts. As per recent information, machines with medium sized work areas, approximately 20 x 30 inches, are more accommodating for most projects while still having space limitations ideal for small workshops or home studios.
A machine with the correct work area dimensions has the potential to greatly influence workflow efficiency and material utilization. Moreover, some laser machines now offer the option of pass-through slots which allow users to process materials larger than the specified work area, enabling even greater flexibility.
Advantages of an Air Assist System
An air assist system is vital in the reduction of errors in laser cutting and engraving. It helps in maintaining the quality of the work by blowing a steady stream of air to cool the cutting point preventing overheating or burning which leads to charring on the edges. This, especially, is of great importance when dealing with wood, acrylic, or fabric materials that discolor or get damaged when subjected to high temperatures for too long.
as per the latest analytics, air assist systems can enhance cutting speeds by 25% since they assist in cutting clean surfaces that are devoid of debris or residual build-up. Moreover, they help to reduce the chances of material particles sticking to the laser lens and hence, aids in prolonging the laser lens’s life. For companies and freelancers, this means savings in time and dollars, as well as decreased maintenance time and output that is consistent in quality. Many systems now have adjustable air pressure controls, adding more customization and precision for users to enhance the efficiency of laser projects by tailoring airflow according to the treated material.
How to Maintain Your Laser Engraver and Cutter?
- Optics Maintenance: Perform maintenance using cleaning solutions designed for use with mirrors and lenses and a soft, non-absorbent cloth to make sure that the laser lens as well as the mirrors are clean and do not suffer any scratches or damage.
- Inspection and Maintenance of the Machine: Dust, shavings and debris has to be cleaned out from the workplace, fan and the air outlet system to avoid the system from being clogged.
- Belt Tension Alignment Check: Alignment and proper adjustment of all the drive belts needs to be done so that there is no deviation from the set precision during the operation of the machine.
- Guiding Rails Lubrication: It is our duty to lubricate the guide slides and other parts which move as was instructed by the maker to prevent damage on those parts.
- Enhancing Efficiency: Assess the efficiency of the water or air coolers to ensure that the machine does not overheat.
- Perform Regular Updates on the Software: Ensure that the machine software is up to date so that it performs better and works well with new features.
Comprehensive Cleaning and Maintenance Guide
Keeping the system in an accompaniment state where all installed modules are functioning optimally and the required tasks are performed as specified in the proposed maintenance manual, such as cooling system maintenance, system lubrication, and moderm system software updates are essential for peak performance.
Adjusting the Laser Beam for Accuracy
Adjusting the laser beam affects the precision of the laser marking and cutting tasks. This is done by shifting the laser focus within the required range marking depth and sharpness. Calibration of laser systems is done regularly for effective work output. Even minor calibrations can affect the marking pace and quality of markings done. For example, focus that is not properly set results in either rough etching, or worse, low productivity because of the lowered system pace.
Tools used for adjustment now provide more modern approaches to proper alignment procedures. With modern laser systems, alignment displacements can be battled easily with the use of auto-focus systems with inbuilt sensors. Research shows that a calibrated laser can fuel the speed of marking by approximately 20% and reduce material wastage of resources. Work done at high precision demands strict control of power wattage and focal length placed on the laser lest it overheat or underperform.
Working Through Common Problems with Laser Machines
Typical problems like varying beam quality, overheating, or inconsistent quality engravings all require some attention in order for the laser machines to function at their best. A dirty lens and mirrors are important break points as well, as they heavily impact efficiency. Having a dirty lens might make the laser lose up to 20% of the power it can use, which is not only disappointing but increases maintenance costs. Regular cleans using the right materials also makes sure scratches or residue that can shift the precision of the laser does not build.
The temperature and humidity level of the enviroment are often overlooked, but for example, maintaining a temperature of 68°F to 75°F makes for constant efficient operation. Changes in temperature can lead to distortion of the beam,which heavily affects anything being marked or cut.Another persistent challenge is alignment issues. An example of this is the optic pathway misalignment which neglects the usefulness of a laser. Real-time data processing, along with advanced alignment methods, is becoming increasingly vital for maintaining precision. Studies claim that employing these tools can enhance laser system precision performance and decrease the need for adjustments by almost 30%. Regular verification of alignment and calibrations promotes optimal performance and reliability of the machinery, thereby enhancing the lifespan of the equipment.
Reference sources
- Optimization of Laser Engraving of Acrylic Plastics1:
- Key Findings: This study focused on optimizing laser engraving parameters for acrylic (PMMA) to reduce energy consumption and CO2 emissions while maximizing production and material removal rates. The scan gap was identified as the most significant factor influencing energy efficiency and production rates. Optimal parameters included a laser power of 44 W, scanning speed of 300 mm/s, and a scan gap of 0.065 mm.
- Methodology: The Grey–Taguchi approach was used for multi-objective optimization. Experiments were conducted using a CO2 laser machine, and parameters like laser power, scanning speed, and scan gap were varied systematically.
- Research and Development of Laser Engraving and Material Cutting Machine from 3D Printer2:
- Key Findings: This research explored the integration of a laser module into a 3D printer, enabling it to function as a multi-purpose CNC machine. The modified printer could engrave and cut materials like thin acrylic glass, offering a compact and versatile solution for prototyping and design tasks.
- Methodology: The study involved modifying an existing 3D printer to include a laser module. It detailed the design considerations, control mechanisms, and noise reduction strategies for the modified machine.
- Design and Fabrication of Laser Engraving Machine3:
- Key Findings: This paper described the development of a portable laser engraving and cutting machine using clear acrylic parts. The machine was designed for ease of use and portability, targeting small-scale applications.
- Methodology: The machine was constructed using laser-cut acrylic components and a compact laser module. The study emphasized the design and assembly process, focusing on creating a user-friendly and efficient device.
- Top Laser Engraving and Cutting Machine Manufacturer and Supplier in China
Frequently Asked Questions (FAQs)
Q: What is the best laser cutter and engraver for acrylic?
A: Your budget and individual requirements will determine the best laser cutter and engraver for acrylic. A xTool M1 desktop laser or 10W diode laser will be adequate for hobbyists and DIY projects. For larger projects, spend on more powerful 40W or 80W CO2 laser cutters.
Q: Is it possible to cut clear acrylics using a diode laser?
A: It is tricky to cut clear acrylic with a diode laser because of its clarity. A CO2 laser cutter is usually more capable with clear acrylic because it can create a flame-polished edge without too much effort.
Q: What is the role of cutting speeds in laser engraving and cutting?
A: A combination of cutting speeds with the quality of finished engraving or cut results is very important. Increasing the cutting speed does the work of reducing the amount of heat generated and thus reduces the damage done to the material. On the other hand, slower speeds enable enhanced cutting and detailing, especially carving precise engravings on thicker materials.
Q: Is there a specific engraver for wood and acrylic?
A: Yes, for wood and acrylic engraving, machines like the xTool F1 and xTool M1 will suffice. These can be used in making home decor, personalized gifts, and other items out of acrylic.
Q: Is it possible to create my own home decor with a laser engraving cutting machine?
A: Of course! A laser engraving cutting machine is best for making home decor items. This machine enables detailed cutting and engraving of varying materials such as wood and acrylic, which augments the mastery of the craftsmen.
Q: How many materials can a 20W cutter machine operate on?
A: A 20W cutter machine operates on many materials such as wood, acrylic and even some thin metals. It strikes an ideal balance between being powerful and precise for cutting and engraving.
Q: What power setting is ideal for cutting through thick acrylic?
A: For thick acrylic, a laser cutter should be in the range of 40 to 80 watts. Because of the higher power levels, clean cuts will be attained when processing thicker materials.
Q: In what ways does a hobbyist gain from using a desktop laser?
A: A hobbyist gains from using a desktop laser because the equipment is compact, user-friendly, and multifunctional. It enables them to experiment, build prototypes, and efficiently produce custom home decor items from materials like wood and acrylic.
Q: What are the advantages of using laser cutters and engravers on wood and acrylic?
A: The advantages are precision, speed, and versatility. Laser cutters and engravers are able to etch detailed patterns “in air” so there is no physical contact with the material, this saves on the wood and acrylic used while also providing smooth and clean edges.
Q: Are there particular laser settings for engraving opaque acrylic?
A: Yes, some settings require adjustments depending on the thickness and the color of the opaque acrylic. For the most part, engravings require deeper cuts which can be achieved at lower speeds and higher power settings without damaging the material.
