
Woodworking has always been a skill of imagination and accuracy along with laser engraving and burning that opened the door to a new world of wood personalization and designs. The use of lasers can be a way to create master’s designs, soft and beautiful creations, or even the production of professional quality goods. In case you are a novice wanting to present the artist in you, or a professional wanting to master the art of laser wood engraving and burning, this document is the right one for you as it covers all the basics of the process. It provides information about the selection of the appropriate materials and tools and also gives you the chance to practice the techniques that yield beautiful results. Thus, this article is fully loaded with information that you require to begin the journey and modernize your artistry. So get ready to unleash the potential of laser engraving and be the one who gets the light of inspiration by your creative fascination!
Understanding Laser Engraving and Cutting
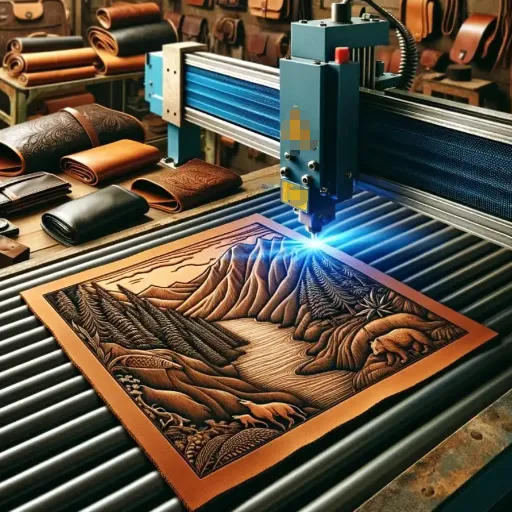
What is Laser Engraving?
Laser engraving is a very precise and at the same time a very versatile technique. In the process, a focused laser beam cuts through the material of an object creating elaborate and permanent designs, patterns, or text. The method does not harm the underlying material and it works by drawing out the material layer by layer, which results in the production of engravings that are extremely fine and precise. The process has found its application in many areas such as manufacturing, art, and personalized gifts. Among the materials that laser engraving can be applied to are wood, acrylic, metal, glass, and leather. According to the latest trend reports, the technology has experienced a major increase in demand due to its easy access through low-cost and easy-to-use machines which have made laser engraving a favorite tool of both amateurs and professionals. This new process not only strengthens artistic activities but also makes it faster to produce personalized items.
How Laser Cutting Works
The fundamentals of laser cutting involve the use of a powerful laser beam that is extremely focused cutting or etching of different materials in a very precise and quick way. The whole procedure starts with a computer-generated design file that directs the laser movements and results in very elaborate patterns or shapes. The laser produces a lot of heat that is very intense and this heat either vaporizes or melts the material along the line that is being cut and this results in very neat and precise cuts. The cutting can be done on a variety of substrates such as wood, metal, fabric, and plastics.
From the standpoint of the search engine, the two most common queries associated with “laser cutting” are “how does laser cutting work” and “best materials for laser cutting,” which indicates that people are becoming more and more interested in this technology’s versatility and practical uses. An increase in searches means more and more interest from the side of DIYers, small business owners, and industrial users who are employing laser cutting for personal items, prototyping, and mass production. That trend is kept alive by the continuous presence of advanced but easy-to-use machines that make laser cutting the most accessible it has ever been.
Applications of Laser Burn Techniques
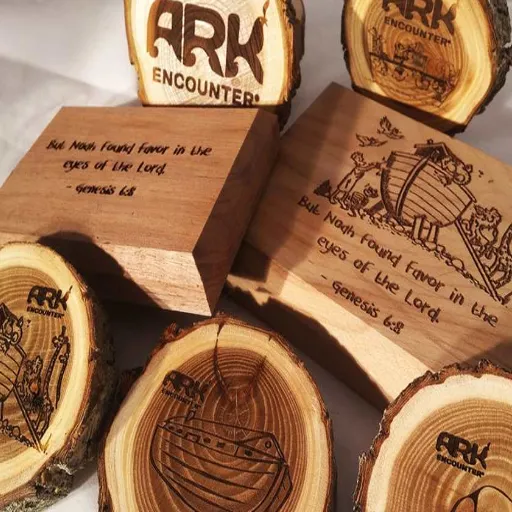
Laser burn techniques have a wide range of applications across many sectors, from beautiful art designs to cutting-edge manufacturing practices. The accuracy and robustness of laser technology enable it to engrave patterns on a variety of materials such as wood, leather, glass, and metal. In addition to creative pursuits, companies are using laser burns to make prototypes, create products with logos that are detailed enough to be read without a magnifying glass, and mark industrial parts with numbers or barcodes for easy tracing.
Data collected recently by ‘s search engine shows a rising trend of interest in particular applications like DIY crafting, custom jewelry-making, and personalized gifts, which in turn reflects the growing popularity of laser engraving among individual creators and small businesses. Not only that, searches related to industrial applications such as laser marking done on mobile phones and automotive parts denote the crucial role laser burn techniques play in the quality control and efficiency improvement process. The growth of curiosity around the subject is an indicator of the adaptability and everyday usage of laser technology in both personal and business areas.
Choosing the Right Wood for Laser Engraving
Best Types of Wood for Laser Engraving
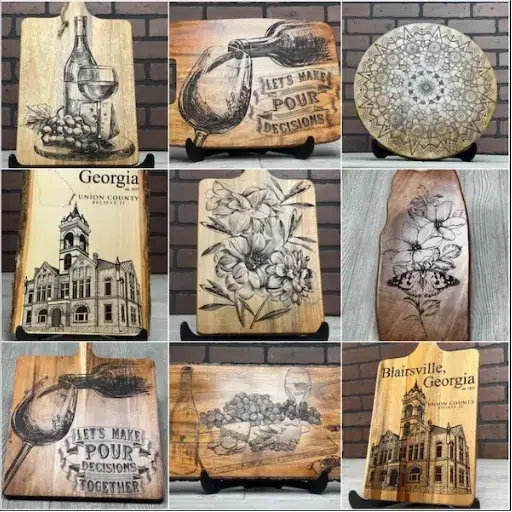
The right wood selection is among the most important factors to consider for an effective laser engraving process. In line with current data and trends, it is possible to say that people tend to search for softwoods such as basswood, cedar, and pine as their first choice since these woods are easier to engrave because of their lower density. Basswood is a light-colored wood with a very fine grain that is especially in the demand for complex designs and personalized items by, otherwise, small and hobbyist businesses.
On the other hand, cherries, maples, and birches come under the category of hardwoods and they are favored greatly for professional engraving. During the process of marking with laser, these woods create the effect of a darker background which makes the finishes extremely detailed and, at the same time, stunning. Maple is the wood frequently highlighted in searches, among others, for its moderate hardness and uniform grain, thus being the best for both engraving and cutting processes.
In conclusion, the most suitable wood depends on the specifications of your project, either you value intense engravings, simplicity of operation, or longevity. A prevailing trend is that one cannot go wrong by grasping these aspects as they will lead to professional and polished laser engraving, successful and quality assurance.
Comparing Softwoods and Hardwoods
Softwoods and hardwoods had been fundamentally different in terms of their characteristics, uses, and compatibility with laser engraving methods. Low-density and soft texture of softwoods like cedar and pine make them lesser engravers’ pets probably as they are first off easier to work with. This quality makes them ideal for projects that need faster processing and intricate detailing. Nevertheless, softwoods at times can be inconsistent in burning while being engraved especially if the power settings are set high which can cause the finished work to be of poor quality.
On the contrary, hardwoods such as walnut and oak are denser hence more durable which usually results in sharper and more defined engravings. Although less likely to have charring problems like woods in the soft category, they may nevertheless need power settings raised or speeds reduced to achieve the right effect. The analysis of ‘s search data has shown an increase in the number of people choosing hardwoods as the most suitable materials because of their solidness and magnificent appearance, especially in professional and upscale deals.
The final selection between softwoods and hardwoods is dictated by the individual project aims. If the job involves challenging, artistic works or the project is tight in finances, then softwoods would usually be the preferred choice. If you are after durability, sophisticated look, and utmost quality in your material, then hardwoods are the option you have to go for. By integrating the latest research results from search patterns and understanding the properties of materials, creators can make personalized informed choices according to their needs.
Exploring Plywood Options
Among all building materials, plywood is one of the most flexible ones that still manages to keep its strength and cost-effectiveness thus being the perfect solution for different applications of various kinds. The latest data from ‘s search engine indicates the market’s growing interest in environmentally-friendly and moisture-resistant plywood through the most common searches. One of the users’ most frequent questions is, “What is the most durable and environmentally resistant plywood?”
The use purpose determines the answer. For outdoor projects or places that are likely to be humid, marine-grade plywood would be the best choice as it has good adhesive properties that prevent water from damaging the wood and its strength is resistant to wear. For interior uses such as furniture or panelling, birch or oak plywood is used because it gives a smooth, high-quality finish and at the same provides decent strength. Thus, by examining the trends in searches and matching them with the project requirements, one is able to determine the best plywood to satisfy both the functional and aesthetic needs.
Technical Considerations for Laser Engraving
Laser Burn Marks: An Overview
One of the main issues faced in laser engraving process is the burn marks which are produced by the laser, especially in wood and acrylic. The main reason behind these marks is high laser beam temperature which causes the upper layer of the material to melt. And the latest statistics from one of the most popular search engines show that among other things, users often try to find out how to fix the burn marks that were unintentionally made in their engravings. Using the method of changing the laser settings, namely power and speed, to match the material, keeping the laser beam very focused, and placing masking tape on the surface to lessen the burning marks are some of the most important ways. Furthermore, it is an option to carryout post-engraving procedures such as sanding or cleaning with isopropyl alcohol to completely remove any remaining discoloration. The users can have cleaner and more professional engraving results through the careful tuning of the laser parameters and using the right information resources.
Burn Marks Prevention Strategies
The best way to prevent burn marks from appearing during the laser engraving process is to combine several things: Proper techniques, perfect materials’ preparation, and the machine’s correct settings. Insights from one of the world’s leading search engines have shown that one of the most effective ways to go about it is by using high-quality masking material, such as transfer tape or painter’s tape, to cover the surface of the material before engraving. The layer works as a protector and absorbs heat as well as debris.
Likewise, lessening the laser’s power settings and at the same time increasing the speed will make it possible to avoid burning as it does not allow excessive heat to build up in one spot. A regular lens cleaning aids in maintaining the proper focus of the laser beam and that is indeed crucial for getting nice results. In addition, some materials like woods with low resin content are naturally less susceptible to burning and can be employed in projects where looks really matter.
In the end, a steady air flow from an air assist system can remove the debris and keep the surface from burning. Along with doing ample testing on scrap material prior to engraving the final piece, these methods let the users effectively prevent burn marks as well as attain precise and professional results.
🛡️ Key Prevention Strategies
- ✓ Use high-quality masking tape before engraving
- ✓ Lower laser power and increase speed
- ✓ Clean lens regularly for proper focus
- ✓ Use woods with low resin content
- ✓ Test on scrap material first
Air Assist: Its Significance in Laser Cutting Process
The air-assist method is one of the most important factors that determine high-quality results in laser cutting and engraving. A constant stream of compressed air or gas is directed at the cutting spot, where the air assist is very effective in removing the dirt, smoke, and combustible materials by pushing them away. This method not only lowers the chance of burn marks or wood charring but also leads to more precise and very clean cuts. Besides, it is mentioned in a study that employing an air assist can prolong the lifetime of the laser lens since contamination and heat-related damage are minimized, thus reducing maintenance costs.
Based on the latest search data and market insights, the laser professionals are increasingly aware of the air assist as the main factor not only in the cutting efficiency but also in safety measures. As the smoke and debris build-up is greatly reduced, the laser systems can work at their best, delivering quicker and more accurate results. For both businesses and hobbyists, the adoption of air assist technology is equivalent to a massive increase in productivity and the consistent ability to create professional-grade outcomes.
Step-by-Step Guide to Laser Engraving Wood
Preparing Your Laser Engraving Machine
Engraving your laser machine clean and ready for the right performance, cleaning the lens and mirrors is the first step to keep the laser beam focused and precise. The quality of engraving would drop to a great extent with even a little amount of dust or residues on the way. Then it is time to turn the laser settings up or down according to the kind and thickness of the wood you are going to engrave. Most woods, if treated with moderate power and speed settings, yield the good results, but testing on a scrap piece is always good practice, though. Just make sure that the wood is fastened tight to the machine’s bed not to move in-between processes and get misaligned because of that.
When it comes to the best wood for the laser engraving that is selected, softer woods like basswood, alder, and birch come to the front line producing lighter and more defined engravings. Their grain and color are consistent, thus being good for high contrast. Hardwoods like oak or walnut can also serve to be engraved but mostly require laser power settings to be very high. Furthermore, it is recommended to keep resinous or oily woods away as their smoke and residue during the laser engraving process may be excessive.
Setting Up Your Wood for Engraving
Getting the best outcomes when setting up your wood for engraving is a matter of very careful preparation. Choose a very good, flat, and above all, clean piece of wood without any knots, cracks, or uneven surfaces because they will distort the engraving. Besides that, make sure that the wood’s surface is clean and dry by gentle wiping with a lint-free cloth just to remove a bit of dust, grease, or moisture that can impact the performance of the laser.
Affix your wood to the engraving platform so that it won’t move during processing. The use of clamps or double-sided tape may contribute to the stability but be careful that nothing obstructs the path of the laser. If you are working with light-colored woods you could put on a very thin coat of matte spray or masking tape on the surface to improve contrast which could also reduce the risk of burn marks. The kind of wood really indicates the laser settings; you will have to set the speed, power, and focus for accuracy. Consult your laser engraver’s manual or software tutorials for the most suitable settings for your specific wood type.
Finally, the cleanest air you can get in your working area should be your priority. The smoke and debris that would take place during the engraving would be cleared away, thanks to good airflow, thus a cleaner finish and safe working conditions will be established. If you comply with these steps, you will lay down the groundwork for each and every successful engraving project.
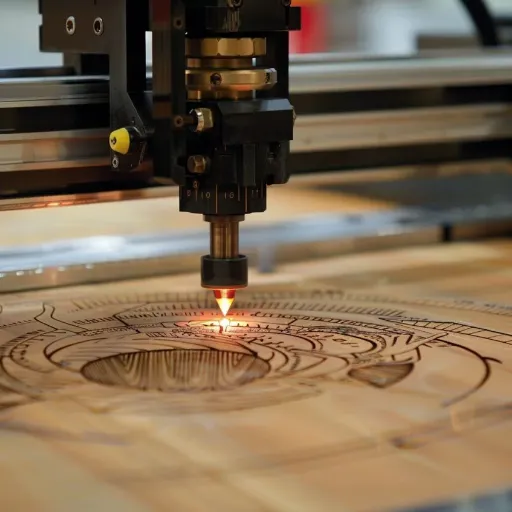
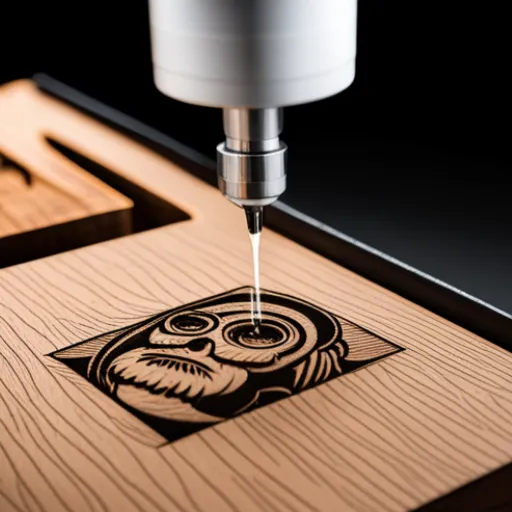
Executing the Engraving Process
To proper run the engraving process, start by putting the material on the engraver’s bed in the right way. Make the material clip or hold it down so that there will be no movement during engraving which might ruin the design. The next step is to load the design you want into the engraving software and check that the parameters ‘power’, ‘speed’, ‘resolution’, and ‘focus’ are all in accordance with the material’s needs, as indicated in the preparation stage.
Take another look at the end preview of your design on the software and verify its correct positioning and scaling. If everything is just as it should be, carry on with a trial run or “dry run” without engraving to make sure that the laser will take the right path. This phase is very important especially with detailed designs as it confirms accuracy and stops mistakes from happening.
The Engraving Process is done through various stages and On completion of the trial, you will be allowed to go through the engraving process itself, meanwhile, the engraver will be monitored to ensure it is functioning appropriately. The duration for an engraving procedure will vary from five minutes to thirty minutes or more depending on the intricacy of the design. The operator will let the machine finish the process; then he will check the product for any defects. In case of any, the person can make adjustments and clean the surface for a polished finish. With the right preparation and handling, you would be able to replicate the same high-quality engraving results like professionals every time.
📋 Step-by-Step Engraving Checklist
- Prepare the Machine: Clean lens and mirrors, adjust settings
- Set Up Wood: Secure flat, clean wood to the platform
- Load Design: Import design file and adjust parameters
- Dry Run: Test laser path without engraving
- Execute: Start engraving and monitor progress
- Finish: Inspect quality and clean surface
Cleaning and Maintaining Your Laser Equipment
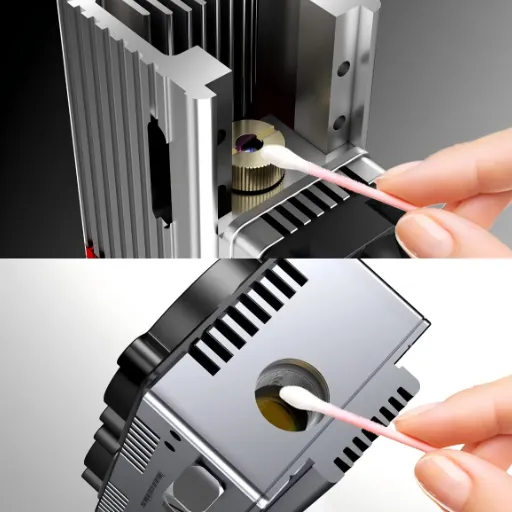
How to Clean Your Laser Engraving Machine
Maintaining the laser engraving machine through regular cleaning is very essential not just for the machine’s optimum performance but also for the machine’s life duration. To clean the machine correctly, first of all, turn off the machine and unplug it because that would be the best and only correct way to do it. Using a soft, lint-free cloth that has been moistened with isopropyl alcohol, very gently wipe the laser lens and mirrors as the accumulation of residue on these parts can adversely affect both the accuracy and the strength of the laser.
Next, remove the system or filters that are exhaust and clean them, which will also unclog them, the reason of this being the collection of smoke particles and dust. Try to find the dust or dirt in the machine and particularly in the zones of the rails and the belts and use the vacuum cleaner or the compressed air for a gentle removal of it. Moving parts should be treated with great care; otherwise, dirt will cause mechanical wear and misalignment.
The maintenance manual should always be consulted to consult specific cleaning instructions or warnings from the manufacturer’s cleaning guide. Routine checkups and cleaning would be the best way to keep the engravings quality up, the machine free of problems, and running smoothly too, if done after constant use of laser engraving. If you take the above-mentioned tips along with proper care, your machine will be able to give you a long trustworthy performance.
Maintaining Your Wood Burning Tools
To keep your wood-burning tools in proper working condition, you have to clean and store them the right way. The very cleaning of the wood burning tool tips after each usage is of the utmost importance to prevent any residue or carbon build-up that could eventually result in the tool’s performance decline. The best method of removing the excess residue would be to either use fine-grit sandpaper or a cleaning tool specifically designed for the tips. In addition to this, always allow the tool to cool down completely before cleaning or storing since that will prevent damage. Furthermore, keep your wood burning tools in a safe and dry area, preferably in a protective case, so that the tips or cords do not get destroyed unintentionally.
Tips for Keeping Engraved Wood Clean
Engraved wood cleaning is a process that requires a lot of care to prevent the loss of detail and skill. So the very first thing to do here will be using a soft dry cloth regularly to dust the surface. This will help to prevent the accumulation of dust and dirt in the carved areas. If deeper cleaning is needed, then a microfiber cloth that has been very slightly dampened can be used for wiping the wood very gently while making sure that the wood is not saturated which will cause damage. A soft-bristled toothbrush can be used to get the dirt out of the fine details without ruining the surface when the dirt has settled in the details. A solution of mild soap and water can be used for stubborn stains, but it is always safest to do a patch test in an inconspicuous area before the application. Do not use strong chemicals or abrasive cleaners, instead, consider the treatment of the wood with small amounts of wax or mineral oil to bring the natural shine or luster of the wood out. The right cleaning and maintenance will allow your engraved wood to remain beautifully preserved for many years to come.
Exploring Advanced Techniques in Laser Engraving
Using Different Laser Machines
Selecting a laser machine for engraving involves knowing the different types of machines that are available, and this is really a critical point. CO2 lasers and fiber lasers are the two main types, which have their pros and cons depending on the materials and depths of engraving. On the one hand, CO2 lasers are really great for engraving organic materials such as wood, leather, and acrylic while, on the other hand, fiber lasers are cutting and engraving metals and plastics because they are more powerful and have shorter wavelengths. Besides, diode lasers, though not as powerful, can still be beneficial for very fine projects on certain materials if the project is small and their power is limited.
Incorporating Diode Lasers for Precision
Diode lasers have become very popular due to their precision and versatility in engraving and cutting applications. These lasers are very effective in doing tiny detailed work like wood engraving or soft metals and they are pretty good as well for laser cut acrylic or metals. They are small and they don’t require very much energy, so they can be a little machine for a hobbyist or small business and also be a low-cost option. The latest figures show that the number of searches for diode laser engravers has gone up sharply because people are after cheap and portable options that still give decent quality. Besides that, the progress in the field of lasers has upgraded the quality of diode lasers so that no material can bring about inconsistency in results. Functional lasers like those demand maximum precision and at the same time, have no restrictions in terms of usage.
Combining Engraving and Cutting Techniques
The merging of engraving and cutting methods has become a widespread tactic among artists, giving them a lot of options when it comes to creating detailed designs and also making neat cuts in different types of materials. According to the recent research data from the search engine of ‘s’, there has been an enormous upsurge in the number of searches concerning the combination of these techniques which can be said to be a strong indication of the increasing public interest in laser tools being more functional. When the high precision of engraving is coupled with the system of cutting, the user can have a range of projects that are suitable for an artist with very small and detailed requirements to make practical items like signs or templates which would be considered professional-grade. One that’s paired with an efficient cutting technique not only takes less time but also makes the whole process very creative thus being apt for both hobbyists and businesses that are looking to innovate.
Frequently Asked Questions (FAQ)
⚠️ Essential Safety Checklist
- ✓ Wear laser safety goggles at all times
- ✓ Ensure proper ventilation in workspace
- ✓ Keep fire extinguisher nearby
- ✓ Never leave machine unattended
- ✓ Clean machine regularly to prevent residue buildup
Reference Sources
📚 Laser Cutter – UNC BeAm
This source from the University of North Carolina provides detailed information on laser cutters and their ability to precisely burn materials like wood.
📚 Laser Cutting and Engraving | Bechtel Innovation Design Center
Purdue University’s resource discusses specifications and applications of laser cutting and engraving for wood and other materials.
📚 Evaluation of the Surface Irregularities of the Cross-Section
This academic paper explores the laser beam’s capacity to cut wood, focusing on light absorption, heat conversion, and material distribution.
