
Cutting acrylic can be tricky when it comes to different techniques and tools, but it is known as an art when done precisely and accurately. Welcome the revolutionary CNC router; this tool has completely changed the paradigm of cutting acrylic for both professionals and hobbyists. If you are an experienced fabricator or just starting to work with acrylic, this guide is for you. It aims to demystify the process and equip you with all the correct information. You will learn how to achieve smooth and clean cuts, tackle your projects with confidence and efficiency, and most importantly, understand the capabilities of CNC routers. Get prepared to embrace the potential of CNC technology and take your creations to another level!
What is a CNC Router and How Does it Work with Acrylic?
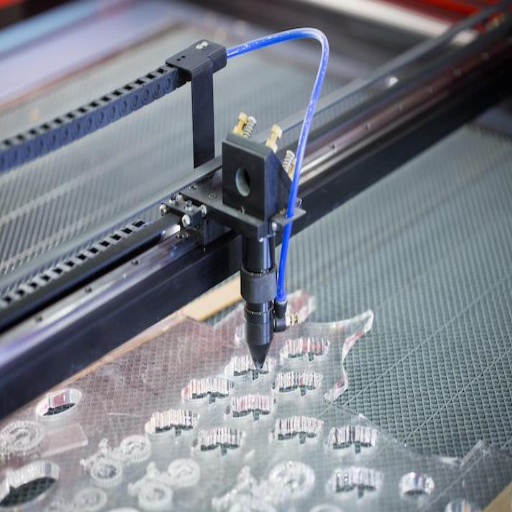
A CNC router is a form of computer-controlled manufacturing that slices, carves, and shapes materials like acrylic with high efficiency and precision. CNC stands for Computer Numerical Control, which means the router relies on step-by-step instructions to follow and execute designs with high levels of accuracy. Regarding acrylic, the CNC router meticulously removes layers of material along a path outlined by the cutting tool, guaranteeing a manual edge and intricate design.
Correct settings, such as cutting speed and the appropriate tool, must be employed to prevent cracks and chips from forming during the process. This is why CNC routers are perfect for machining various products from acrylic, including signs and custom parts.
Understanding CNC Technology in Acrylic Cutting
CNC technology has become widely adopted in industries such as sign making or aerospace engineering due to its unmatched speed, efficiency, and accuracy when cutting acrylics. Computer numerical controlled (CNC) systems can do much more than simple cuts; intricate designs can be crafted with a precision of ±0.005 inches,, guaranteeing uniform and professional output even during mass production. In addition, CNC routers overcome most manual cutting processes in speed, with cutting acceleration reaching over 200 inches per minute IPM, depending on the machine and thickness of the material.
The diversity of materials that can be used with CNC machines also includes different types of acrylic, cast, and extruded acrylic, which shows the reliability and flexibility of these machines. For example, cast acrylic can be machined more cleanly, and detailed casters tend to crack less, making it more favorable for detailed work. Extruded acrylic, on the other hand, is cheaper but requires specific rates in terms of speed and feed in order to preserve edge detail.
Today’s CNC routers feature advanced automations like vacuum beds that hold parts in place, dust collection systems for clean operations, and multi-axis capabilities for creating complex three-dimensional shapes. These advancements improve functionality and minimize material wastage by ensuring efficient cuts. Recent market research states that the global demand for acrylic sheets will increase at a compound annual growth rate (CAGR) of 5.5% from 2021 to 2028. CNC technology maintains its relevance in supporting this growth while upholding strict production standards.
From an industry perspective, adopting CNC technology for acrylic sheets increases operational productivity, lowers direct labor expenditures, and provides faster delivery of intricately detailed products. These factors are decisive in remaining relevant in the market.
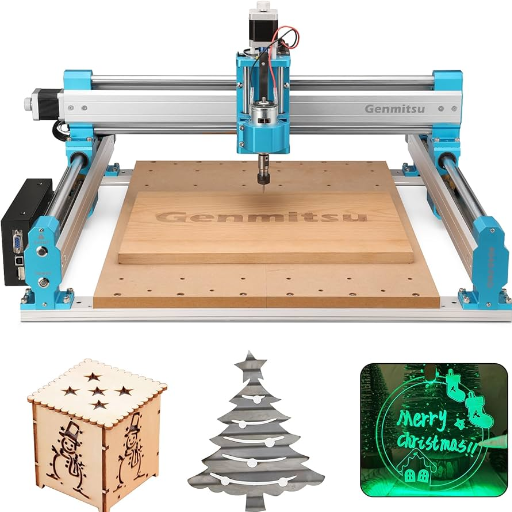
Components of a CNC Router Machine for Acrylic
A CNC router machine is meant for acrylic works with parts like a robust base, drive system, spindle, vacuum table, specialized bits, and software to control the machine.
| Component | Function | Key Feature | Material | Importance |
|---|---|---|---|---|
|
Rigid Base |
Stability |
Vibration-free |
Steel/Aluminum |
Precision |
|
Drive System |
Motion control |
Smooth operation |
Helical rack |
Accuracy |
|
Spindle |
Cutting tool |
High RPM |
Steel |
Clean cuts |
|
Vacuum Table |
Material hold |
Strong suction |
Aluminum |
Workholding |
|
Specialized Bits |
Cutting acrylic |
Sharp, durable |
Carbide |
Smooth finish |
|
Control Software |
Operation control |
G-code support |
Digital |
Automation |
How to Use a CNC Machine for Cutting Acrylic
A CNC router machine can cut and engrave acrylic pieces to different shapes and sizes used in most buildings today. A clean finish and proper steps must be followed to achieve the best results. Here is a detailed breakdown:
- Pick Out a Suitable Acrylic
A specific kind of acrylic needs to be chosen for projects. Cast acrylic is the best option for engraving, and extruded acrylic is preferred for cutting since it is softer.
- Edit Your Design File
The first step should be done on either CAD or CAM systems, which offer designing software. The design for acrylic should be arranged in a way that simplifies and improves cutting efficiency, with proper layer sequencing and adjustment of tool depth.
- Choosing the Right Tools
To slice through acrylic, a single- and double-flute end mill must be used. A sharpened acrylic cutter is advised, as it lowers friction better.
- Adjust Settings as Required
Settings should be adjusted at the CNC machine based on the exact thickness of acrylic and the tools to be used. Recommended settings are for the feeding pace, 800-2500 mm/min, depending on the material, and for the spindle, 18,000-24,000 RPM.
- Secure the Acrylic Sheet
Secure the acrylic sheet on the CNC router’s workbench with clamps or a vacuum bed. This will keep it stable during cutting and prevent the material from moving.
- Run a Test Cut
Perform a small test cut on scrap acrylic to check if the settings are correctly aligned. This step prevents issues with the tool, speed, or feed rate from escalating before initiating the primary task.
- Monitor the Cutting Process
Watch out for signs of excessive melting heat and ensure the chips are clear, which implies clean cutting.
- Post-Processing
After cutting, smooth the acrylic edges with light hand sanding. For a clearer polish, apply polishing agents to the edges.
After following these steps and using CNC machines, you can make masterfully crafted designs using acrylic as a sign, decor, or functional prototypes. A quick Google search shows that CNC acrylic cutting is a steadily searched topic, which shows its value in current production technologies.
What Type of Acrylic is Best for CNC Routing?
Cast acrylic is the best option for CNC routing because of its quality and workability. It provides clean cuts and polished seams, which are important for precise applications. Compared to extruded acrylic, cast acrylic is less likely to melt from the heat produced by CNC tools, providing smoother and more consistent results.
Cast Acrylic vs. Extruded Acrylic: Which is Better?
Extruded acrylic is cheaper, easier to thermoform, and has uniform thickness, but cast acrylic offers superior optical clarity, scratch resistance, and chemical resistance.
| Aspect | Cast Acrylic | Extruded Acrylic | Key Note |
|---|---|---|---|
|
Cost |
Higher |
Lower |
Budget-friendly |
|
Clarity |
Superior |
Good |
Visual quality |
|
Scratch Resist. |
High |
Moderate |
Durability |
|
Thickness |
Up to 4″ |
Limited |
Versatility |
|
Thermoforming |
Difficult |
Easy |
Flexibility |
|
Chemical Resist. |
High |
Moderate |
Solvent use |
|
Cutting |
Clean edges |
Easier flame polish |
Finish quality |
Choosing the Right Type of Acrylic Sheet for Your Project
Evaluating acrylic sheets’ prices, optical clarity, durability, and specific use cases is vital. This is particularly important when working on a project. Below is a description to assist you with making your choice.
- For Premium Visual Projects
If you are working on furniture, display cases, or signage that requires ultra-clearness, cast acrylic sheets are the best fit. They have superior light transmission and scratch resistance, which ensures higher aesthetics. Although they are a bit expensive, their durability and exceptional quality will certainly yield a considerable return on investment.
- For Budget-Friendly Options
Extruded acrylic sheets are more affordable and will make things easier if the application is general. They have a more consistent thickness, making them easier to process. This means they can be used in projects like protective barriers and DIY projects, but you should keep in mind that they are not as scratch-resistant as cast acrylic.
- For Complex Shapes and Designs
Thermoforming usually involves more intricate designs, for which extruded acrylic excels due to its ease of forming and flexibility. This allows fabricators to work more efficiently on the shaped or molded components.
- For Chemical Resistance or Harsh Environments
When compared to other materials, cast acrylic sheets are likely the best option for applications that require the structural and chemical durability of acrylics لأنها have the highest chemical resistance. They may be used to make devices for laboratories or places where maintenance-free service is needed for a long time.
Cross-checking with the recent trending searches online, it is evident that cast acrylic sheets are the most sought-after option for projects that prioritize quality and scratch resistance, unlike extruded acrylic, which is more economical and preferred for functional designs. Knowing these differences prevents the risk of choosing the wrong material for your specific project needs.
How to Set Up Your CNC Router for Cutting Acrylic?
- Picking the Bit: A single-flute or double-flute bit explicitly designed for acrylic cutting should be used. These types of bits minimize heat buildup and guarantee a clean cut.
- Set the Correct Speed and Feed Rates: Set the spindle to low rpm and mid feed on the CNC router. These settings will avoid melting the acrylic while allowing precision cutting.
- Hold the Acrylic Sheet Securely: The acrylic should be secured with a clamp or vacuum table to prevent movement during cutting. Movement will yield inaccurate results.
- Apply a Scratch-Resistant Masking Layer: Keeping the protective film on the acrylic while cutting or applying masking tape reduces scratches while enforcing a chipping guard.
- Optimize Cutting Depth: A shallow depth per pass significantly reduces material cut stress and yields smoother edges.
- Caution: Use of Cooling Ensure: Using compressed air or mist coolant to cool the bit and surrounding material will greatly improve temperature control, otherwise known as heat buildup.
- Chambers: Avoid Full Cut Action Until Test. Ensure all settings for the desired results are in place beforehand, executing multiple attempts on the same piece.
If all the steps outlined above are followed, achieving the desired level and quality of precision cuts using CNC routers with acrylic is highly achievable.
Machine Setup: Preparing Your CNC Router
CNC routers require precise prepping for everything to work correctly. A significant step before anything else is cleaning the working area. You must wipe down all surfaces of the CNC router to get rid of dust, small particles in the work zone, and any materials that may inhibit the cutting. Cleaning scrapes from past projects is crucial. Securely mount the acrylic sheet onto the router’s bed using either clamps or a vacuum table. Your acrylic sheet’s position may change during the router’s operation, resulting in material casualty, rough cuts, or damage to the machinery.
Skipping ahead, use an O-flute or single-flute bit screw. Sail through the initial stages by grabbing the correct shaft cylinder to move the acrylic. Verify that the bit is secured appropriately to the collet because slippage while cutting can be catastrophic. Consider the material you have because different materials are twisted differently. The shaft cylinder’s rate of motion should correspond with the kind and thickness of the acrylic. Most bosses on controllers recommend spinning the bit between 16,000 and 18,000 RPM when cutting soft materials.
Slower adjustments, depending on the long and wide points of the acrylic’s sides, are equal to precision fitting zero points on the CNC machine’s arms. Precise measurements will allow you to consider the edges of the acrylic layer of the sheet you’ll be working on, including the circumference formed by putty traces. Do not cut more than required; therefore, use advanced tool path strategies such as adaptive clearing; they’ll help you eliminate excess material while keeping the structure and form intact. The CNC router will give proper results if these simple yet effective tactics are applied.
Choosing the Right Router Bit for Acrylic Cutting
Choosing the right router bit is vital for the cuts on acrylic to be clean and polished. The latest studies and industry advice suggest using single-flute or double-flute carbide bits for acrylic, and single-flute bits are handy since they have good chip clearance, which will stop material from melting from heat. Double-flute bits, on the other hand, can be beneficial for achieving smoother edge finishes. Spiral upcut bits are the most preferred for long-term use for their chip evacuation capabilities and longevity. The bit’s diameter and tip geometry must also be chosen based on the thickness and detail level needed for the acrylic project. Combining these bits with proper settings ensures an outstanding result.
What are the Best Practices for Cutting Acrylic on a CNC Router?
- Use the Correct Bit—Choose a sharp, single—or double-flute bit tailored for acrylic cutting. These bits guarantee clean, accurate cuts while minimizing the chance of melting.
- Set the Correct Feed Rate and Speed—A moderate feed rate and RPM will avoid overheating. Slower speeds improve cutting and fresh-finish surfaces.
- Secure the Material Firmly—To tighten acrylic pieces in order, use clamps or a vacuum table for better positioning. Uncontrolled movement during cutting can lead to inaccuracies.
- Clean the Work Area Frequently – Keep the workspace organized, removing chips to avoid disruption during cutting.
- Ensure Proper Cooling—Maintain the acrylic cool with air from air compressors while separating it from the surface being cut. This prevents excessive heat from accumulating and enhances the cutting quality.
Maintaining these practices will enhance your ability to cut acrylic consistently and efficiently on a CNC router.
Guide on Cutting Depth and Feed Rate for Acrylic
Achieving clean and precise cuts when cutting acrylic with a CNC router requires proper cutting depth and feed rate selection. Each pass should not exceed a Cutting Depth of Half Diameter (CDHD) which is equal to one half of the tool’s diameter. For instance, with a 1/4-inch bit, the maximum cutting depth of 1/8 inch should be set. This aids in alleviating stress on the material and the tool during the operation and improves efficiency.
Around 50 to 100 inches per minute (IPM) is the commonly suggested feed rate. Also, the router and bit type will influence the ideal acrylic feed rate and the sheet’s thickness. A single-flute and two-flute upcut bit work better when feeding acrylic material because they counteract melting and overheating by performing chip removal optimally. Setting spindle speed around 12,000 to 18,000 RPM aids in achieving the balance needed for a clean edge finish alongside melt and heat avoidance.
Employing the correct feed rate with cutting depth, along with the right machine and tool setting can produce professional acrylic processing results. Make changes based on your test cuts and work with conservative settings for the first trial to maximize the efficiency of your CNC router.
Cutting Speed: Finding the Sweet Spot for Clean Cuts
Dialing in the correct cutting speed is fundamental for clean and precise cuts when working with a CNC router. For wood and acrylic, starting with a spindle speed between 16,000-18,000 RPMs is best. Factors such as the material type, the tool in use, and the cut depth are key in determining optimal spindle speed. Most acrylic and wood plastics require feed rates between 100-300 inches per minute (IPM), while hardwoods work best at lower speeds of around 12,000 to 15,000 RPMs and 50-150 IPM feed rates.
The balance between spindle speed and feed rate is essential for avoiding overheating and melting the material, while overly aggressive cuts can chip the piece. Close monitoring of edge quality and chip size during minor test cuts is excellent advice from the experts and users online, alongside precise adjustments, setting professionals further ahead. Consistent fine-tuning of these parameters results in clean, efficient, and professional-grade outputs.
Tips for Preventing Melting Acrylic During the Cutting Process
- Use the Right Cutting Tool
For acrylic fabrication, always utilize a sharp, high-quality cutting tool. Single-flute and carbide-tipped tools are highly recommended since they enhance chip removal and lower heat build-up.
- Optimize Spindle Speed and Feed Rate
Keep spindle speed at 8,000-18,000 RPM (with a feed rate of 50-150 IPM) to keep acrylic from melting due to friction.
- Utilize Compressed Air or Coolant
Using an air source to blow into the cutting area improves heat dissipation. Cooling during the cut reduces melting, improving edge quality.
- Minimize Contact and Pass Depth
Best practice for cutting depth is 0.06 to 0.1 inches per pass. This mitigates tool contact and overlaps with prolonged cutting, reducing heat build-up.
- Avoid Dull Tools
Dull tools should be avoided, as they increase friction when used, which raises the temperature. Tools should be sharp for optimal outcomes. Regular checks should be done to replace tools displaying any signs of wear.
Reference Sources
1. Pengaruh Variasi Kecepatan Feeding Pada CNC Router 3 Axis Dengan Material Alumunium Dan Acrylik
- Authors: N. Ariyanto
- Publication Date: 2018-07-04
- Summary:
- This study investigates the effect of feed rate on the machining results of acrylic and aluminum using a 3-axis CNC router.
- The research aims to determine how different feed rates impact the quality of the machining process.
- Methodology:
- The study employs three different feed rates (100 mm/min, 150 mm/min, and 200 mm/min) for machining.
- The results are measured regarding machining quality and time taken for each material.
- Key Findings:
- The study found that a 100 mm/min feed rate produced better machining results for aluminum, while higher feed rates were more effective for acrylic.
- The research highlights the importance of optimizing feed rates for different materials to achieve desired machining outcomes(Ariyanto, 2018).
2. Analisis Toolpath Variasi Zig Zag Dan Spiral Mesin CNC Router Terhadap Benda Kerja Berbahan Acrylic
- Authors: Gilang Bagus Juniantoro et al.
- Publication Year: 2016
- Summary:
- This paper uses a CNC router to analyze the effects of different toolpath strategies (zig-zag and spiral) on acrylic machining.
- Methodology:
- The study compares the performance of zig-zag and spiral toolpaths in terms of machining time and surface finish quality.
- Various parameters, such as spindle speed and feed rate, are controlled during the experiments.
- Key Findings:
- The results indicate that the choice of toolpath significantly affects the machining efficiency and surface quality of acrylic materials(Juniantoro et al., 2016).
3. Top CNC Router Manufacturer and Supplier in China
Frequently Asked Questions (FAQs)
Q: What is the best way to cut acrylic sheets using a CNC router?
A: The best way to cut acrylic sheets using a CNC router is to choose the right bit, such as a solid carbide slow spiral bit, and set the CNC router settings correctly to ensure a smooth cut.
Q: Can I use my woodworking bits to cut acrylic using a CNC router?
A: While woodworking bits can be used, it is recommended to use specialized CNC router bits designed for acrylic to achieve better results on acrylic and avoid chipping.
Q: What is the correct bit size for cutting thick acrylic?
A: The right bit size for cutting thick acrylic typically depends on the thickness of the material. A larger diameter bit may be more effective for thicker acrylic sheets, but it’s essential to consider the CNC router settings and bit type for optimal results.
Q: How can I achieve a smooth cut when CNC cutting acrylic?
A: To achieve a smooth cut when CNC cutting acrylic, use a sharp flute router bit, maintain the correct feed rate, and set the cutting depth appropriately to reduce stress on the material.
Q: What are the best CNC router settings for machining acrylic?
A: The best CNC router settings for machining acrylic include a slower feed rate, higher spindle speed, and appropriate cutting depth to minimize melting and ensure clean edges.
Q: Is drilling holes in acrylic with a CNC router possible?
A: Yes, drilling holes in acrylic with a CNC router is possible. Using the right bit, such as a 60° engraving bit, and adjusting the CNC router settings will help create precise holes in acrylic without damaging the material.
Q: What types of acrylic can be cut on a CNC router?
A: A CNC router can cut various types of acrylic, including clear, colored, and thicker sheets, provided the appropriate bits and CNC settings are used.
Q: How do I set the cutting depth when CNC routing acrylic?
A: To set the cutting depth when CNC routing acrylic, measure the thickness of the acrylic sheets and adjust the CNC router’s cutting depth settings accordingly, ensuring that you do not exceed the material’s thickness to avoid damage.
Q: Can I perform 3D engraving on acrylic using a CNC router?
A: Yes, you can perform 3D engraving on acrylic using a CNC router. Using the right bit and settings will allow you to create detailed acrylic designs and engravings effectively.
Q: What maintenance is required for CNC router bits when cutting acrylic?
A: Regular maintenance for CNC router bits when cutting acrylic includes cleaning the bits after use to remove any residue and ensuring they are sharp to maintain cutting efficiency and quality results on acrylic.
